How to Replace a Shower Head in 4 easy steps – As a homeowner, you might be tired of dealing with a variety of plumbing problems. While fixing some of the issues like leaks calls for professional expertise, there are other problems that you could fix yourself. DIY techniques can save you a lot of money, provided that you do them right. Replacing fixtures are the most common plumbing tasks that you can handle by yourself. Homeowners often need to replace their shower heads due to various reasons. Our professionals at A Clear Choice Plumbing can help you out if you need any assistance.
Replacing your showerhead: How to go about it?
You might have to replace your shower head due to different reasons. A leaky or faulty showerhead requires quick replacement to prevent the wastage of water and to ensure proper functioning. In other cases, you might want to replace it simply for the sake of aesthetics. Here are four easy steps that you may follow to replace your shower head:
Preparation
You would have to start with preparing the workspace. Assemble the necessary tools and components, such as:
- A new shower head
- A pair of slip-joint pliers
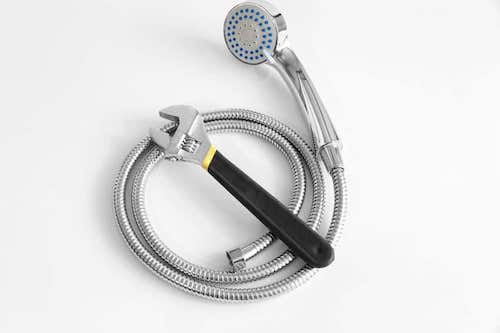
- An adjustable wrench
- A tarp or a blanket
Now, turn off the shower completely to make sure that it doesn’t drip water while you work on it. Law down the tarp or the blanket below the shower so that small components do not go down the drain in case you drop them.
Removing the old shower head
You would now have to remove the existing shower head. If the shower head lies loosely screwed, you may take it off with your hands by simply turning it counterclockwise. Else, you would have to wrap a cloth around the base of the shower head and clamp down on it with a wrench. You may now unscrew the shower head by turning it with the wrench. Wipe off the screw threads from the shower arm using a clean rag.
Installing the new shower head
Once you have wiped the screw threads and cleaned all the built-up grime, wrap a fresh Teflon tape around them. Make sure that they set in properly over the grooves. Now attach the new shower head in place and secure it b twisting in a clockwise direction. Use your tools to screw the shower head as tightly as you can. Wrap a cloth around the base and clamp it with the pliers for a tighter grip.
Once you have replaced the shower head, turn on the water to check if it is working as intended. If it leaks, you might have to reapply the Teflon tape and tighten it more.
What to do if you need assistance?
In case you feel like the task is too complex, feel free to contact a professional company like us for guidance. Professional services would also be helpful in case there are any damages to the shower arm or if you damage it while trying to replace the shower head. If you need help, feel free to call A Clear Choice Plumbing at (720) 938-1554 or fill out the form below.


