How to Replace a Garbage Disposal
There comes a time in every homeowner’s life when appliances and fixtures need replacing. A garbage disposal is one such essential yet often overlooked fixture. These robust units last many years with regular maintenance, but inevitably, even the sturdiest models may break down and require replacement.
Replacing a garbage disposal might seem like a daunting task for a novice, but with the right tools and a bit of guidance, it can be a straightforward DIY project. But remember, there’s no shame in opting for a professional, such as A Clear Choice, to handle these kinds of projects. We ensure quick, professional service with a respectful approach, and our sterling reputation speaks for itself. However, if you’re eager to tackle the task yourself, let’s walk you through the process.
Before You Start: Preparing for the Project
The first step involves selecting a suitable replacement. Purchase a model that fits your sink drain’s opening and matches your usage needs. Make sure the kit includes all components listed in the instruction sheet that accompanies it.
Another key factor to consider is the circuit’s amperage. You need to ensure the disposal won’t overload the circuit. The required information is usually present on the breaker switch.
Safety First: Precautionary Measures
Safety is paramount in any DIY task. Here’s how you can keep yourself safe:
- Disconnect the electrical power to the garbage disposal at the main circuit breaker.2.
- Ensure the power is off by attempting to turn on the disposal.
- Don safety glasses to protect your eyes from any flying debris.
- Finally, clear the area beneath your sink to create a spacious workspace.
Step 1: Removing the Drain’s Tube and Arm
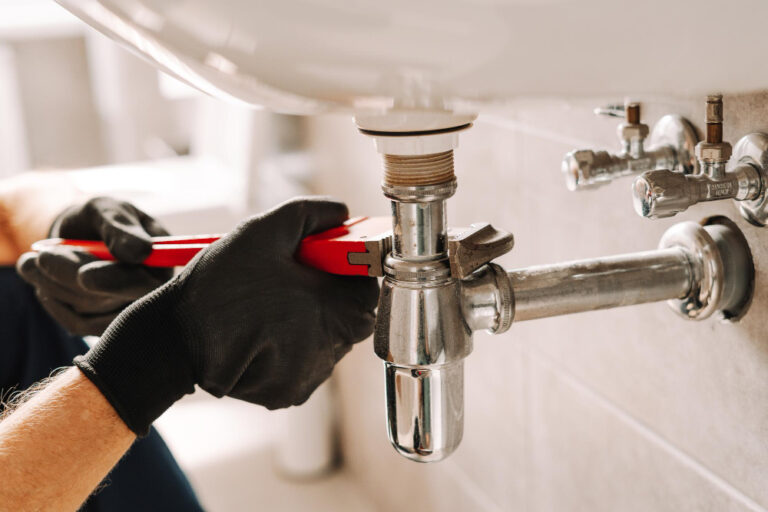
The drain’s arm connects the garbage disposal to the sink’s drainage system. Start by disconnecting it from the unit. For this, you’ll need a sturdy pair of pliers or a pipe wrench to loosen the spring clamp holding the drain tube. Once the clamp is loosened, gently remove the tube from the unit.
Step 2: Taking Out the Old Disposal Unit
Twist off the mounting nut to detach the disposal. Once removed, drain all residual water and debris from the unit. Turn the disposal upside down to gain access to the plate covering the electrical connections. After disconnecting the wires and removing the grounding screw, cautiously extract the cable from the unit. Depending on your unit’s design, loosening the strain relief valve might be required. Proceed to remove the drain and existing mounting assembly.
Step 3: Installing the New Mounting Hardware
New mounting hardware ensures your new disposal unit securely attaches to the sink. The installation process involves placing a rubber seal under the drain flange. If the disposal unit does not come with a rubber seal, plumber’s putty is a perfect substitute. Now, slot the drain flange into the drain hole. Place another rubber seal on the drain flange under the sink, followed by attaching the backup ring (flat side up).
Step 4: Attaching the New Mounting Ring
The mounting ring is essential for securing the garbage disposal unit to the sink. Begin by loosely securing the new mounting ring with the three screws. Push the ring up and use a snap ring to fasten it. Tighten all the screws until the assembly is balanced and firmly held in place.
Step 5: Finalizing the Unit Installation
Almost there! Now it’s time to connect all the electrical wires – splice black to black and white to white, securing these connections with wire nuts. Attach the ground wire to the green screw on the unit. After replacing the cover plate and fixing the disposal in place, ensure the unit is properly aligned before restoring the power.
Step 6: Testing Your New Garbage Disposal
Congratulations on installing your new garbage disposal! Now it’s time to test it. Before you start, make sure the power is connected correctly. Then, run cold water and turn on the disposal. If the unit operates smoothly without any unusual noises or leaks, your installation is successful.
Step 7: Maintenance and Care
The final step of your DIY journey doesn’t end with the successful installation of your garbage disposal but extends to its care and maintenance. Regular upkeep not only enhances the efficiency of your garbage disposal but also prolongs its lifespan.
Always run water when the disposal is on to facilitate the grinding process and to carry the waste down the drain line. Avoid dumping hard or fibrous waste, which can dull the blades and clog the pipes. Every few weeks, freshen up your disposal by grinding some ice cubes along with a small piece of lemon, lime, or orange peel.
Additional Tips and Precautions
Although the steps mentioned above apply to most models, remember to refer to the manufacturer’s instructions for specific details about your specific model. For instance, if your disposal seems jammed or stuck, use a wrench to manually turn the blades to break up the obstruction.
How long does it take to replace a garbage disposal?
For us it’s a pretty quick job because we have the tools and the experience. For you it really depends on how much plumbing experience you have, if you get the right unit, etc etc. It can take anywhere from an hour to a a day or two depending on parts availability.
In Conclusion
DIY projects such as replacing a garbage disposal can seem intimidating at first but can turn out to be fulfilling and cost-effective with the right instructions and safety precautions. If you still run into issues or don’t feel confident handling the replacement yourself, don’t hesitate to contact us at A Clear Choice. Our team of experts can ensure the new disposal is installed correctly, safely, and with professional efficiency.
Remember, whether you’re a seasoned DIYer or a rookie, there’s a unique joy in creating and fixing things with your own hands. But there’s also wisdom in knowing when to ask for professional help. Whatever your choice, make sure it’s the clear one for your home and safety. Contact Us today